
Cinnamon Roll Comparison
28 Jun 2026
Category: Pastry · Cinnamon Rolls
A semi-scientific comparison of cinnamon roll recipes — scored by multiple tasters across texture, flavor, and icing.
Brown Butter Chocolate Chip Cookies
08 May 2026
Category: Desserts · Cookies
Recipe: NYT — Brown Butter Chocolate Chip Cookies
Rating: 4 / 5 · Make again: Yes · Made by: Jamel
Brown butter and bigger chocolate chunks make these stand out — crunchy edges, soft chewy center, with a burst of coarse salt in every bite.
Our Favorite Sandwich Bread
06 May 2026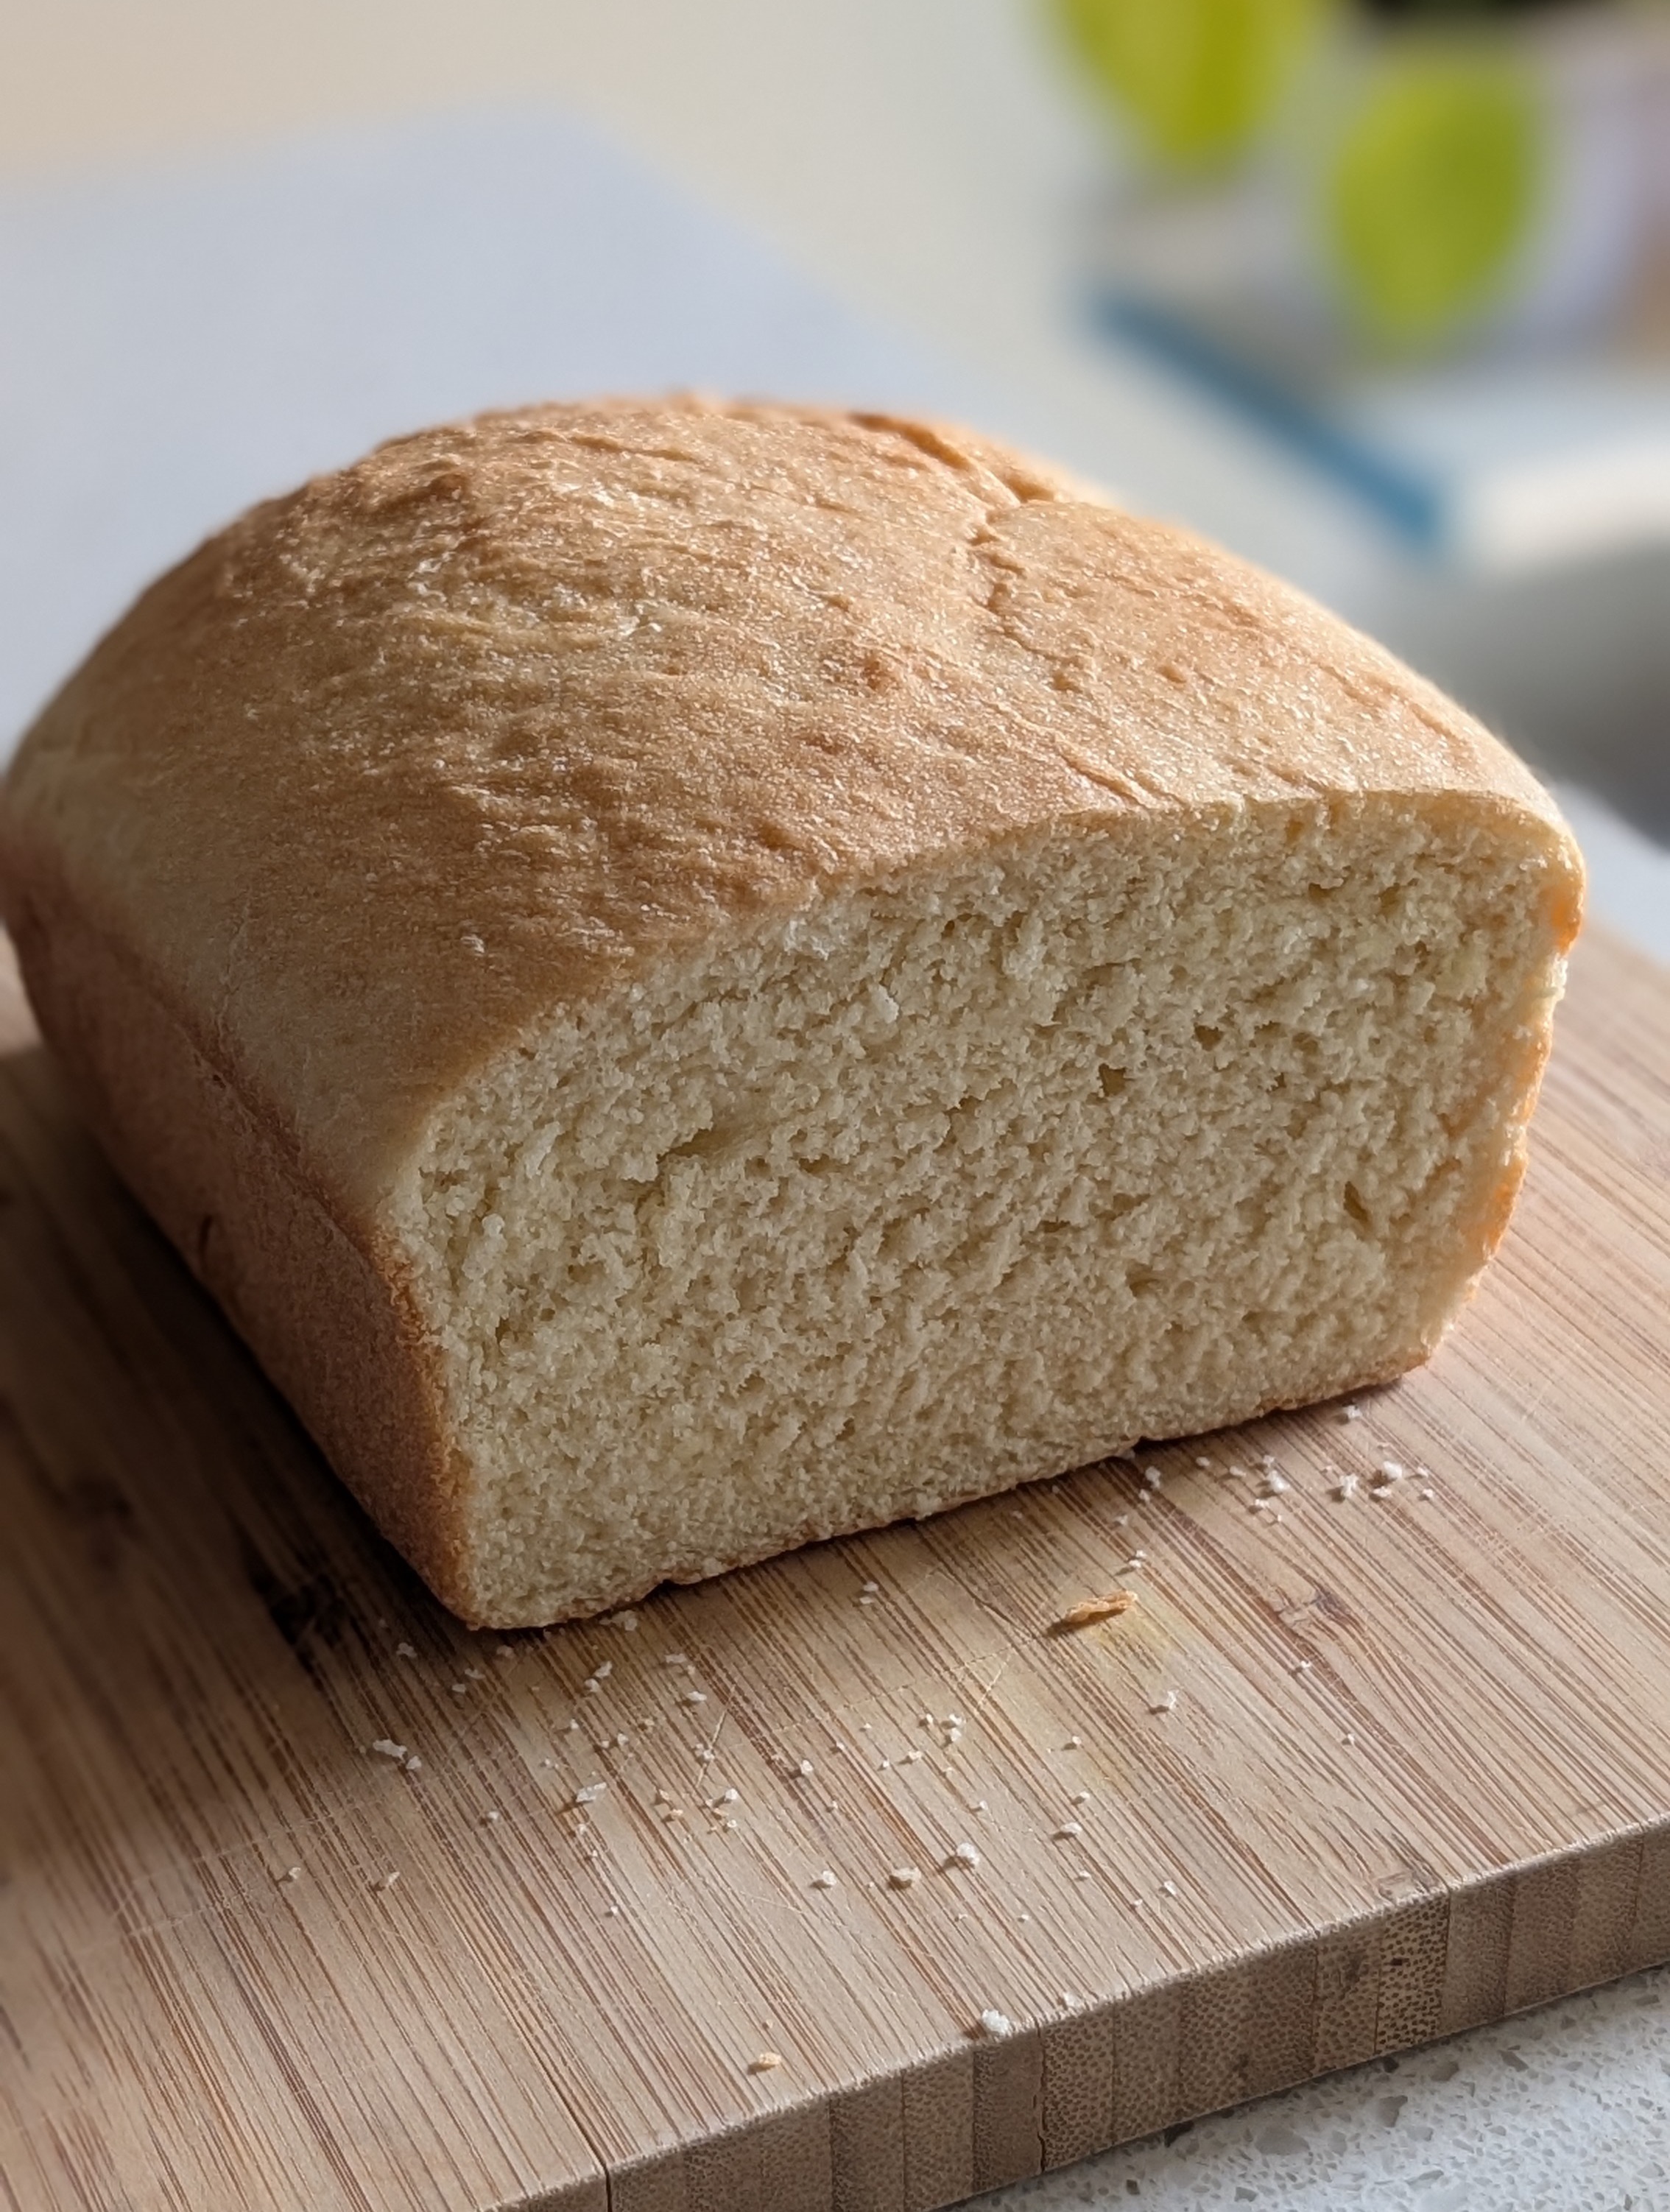
Category: Bread · White Bread
Recipe: King Arthur — Our Favorite Sandwich Bread
Rating: 4 / 5 · Make again: Yes · Made by: Aaron
Really soft with a lightly sweet, pillowy crumb — it toasts up perfectly and smells like challah.
Vermont Sourdough
20 Apr 2026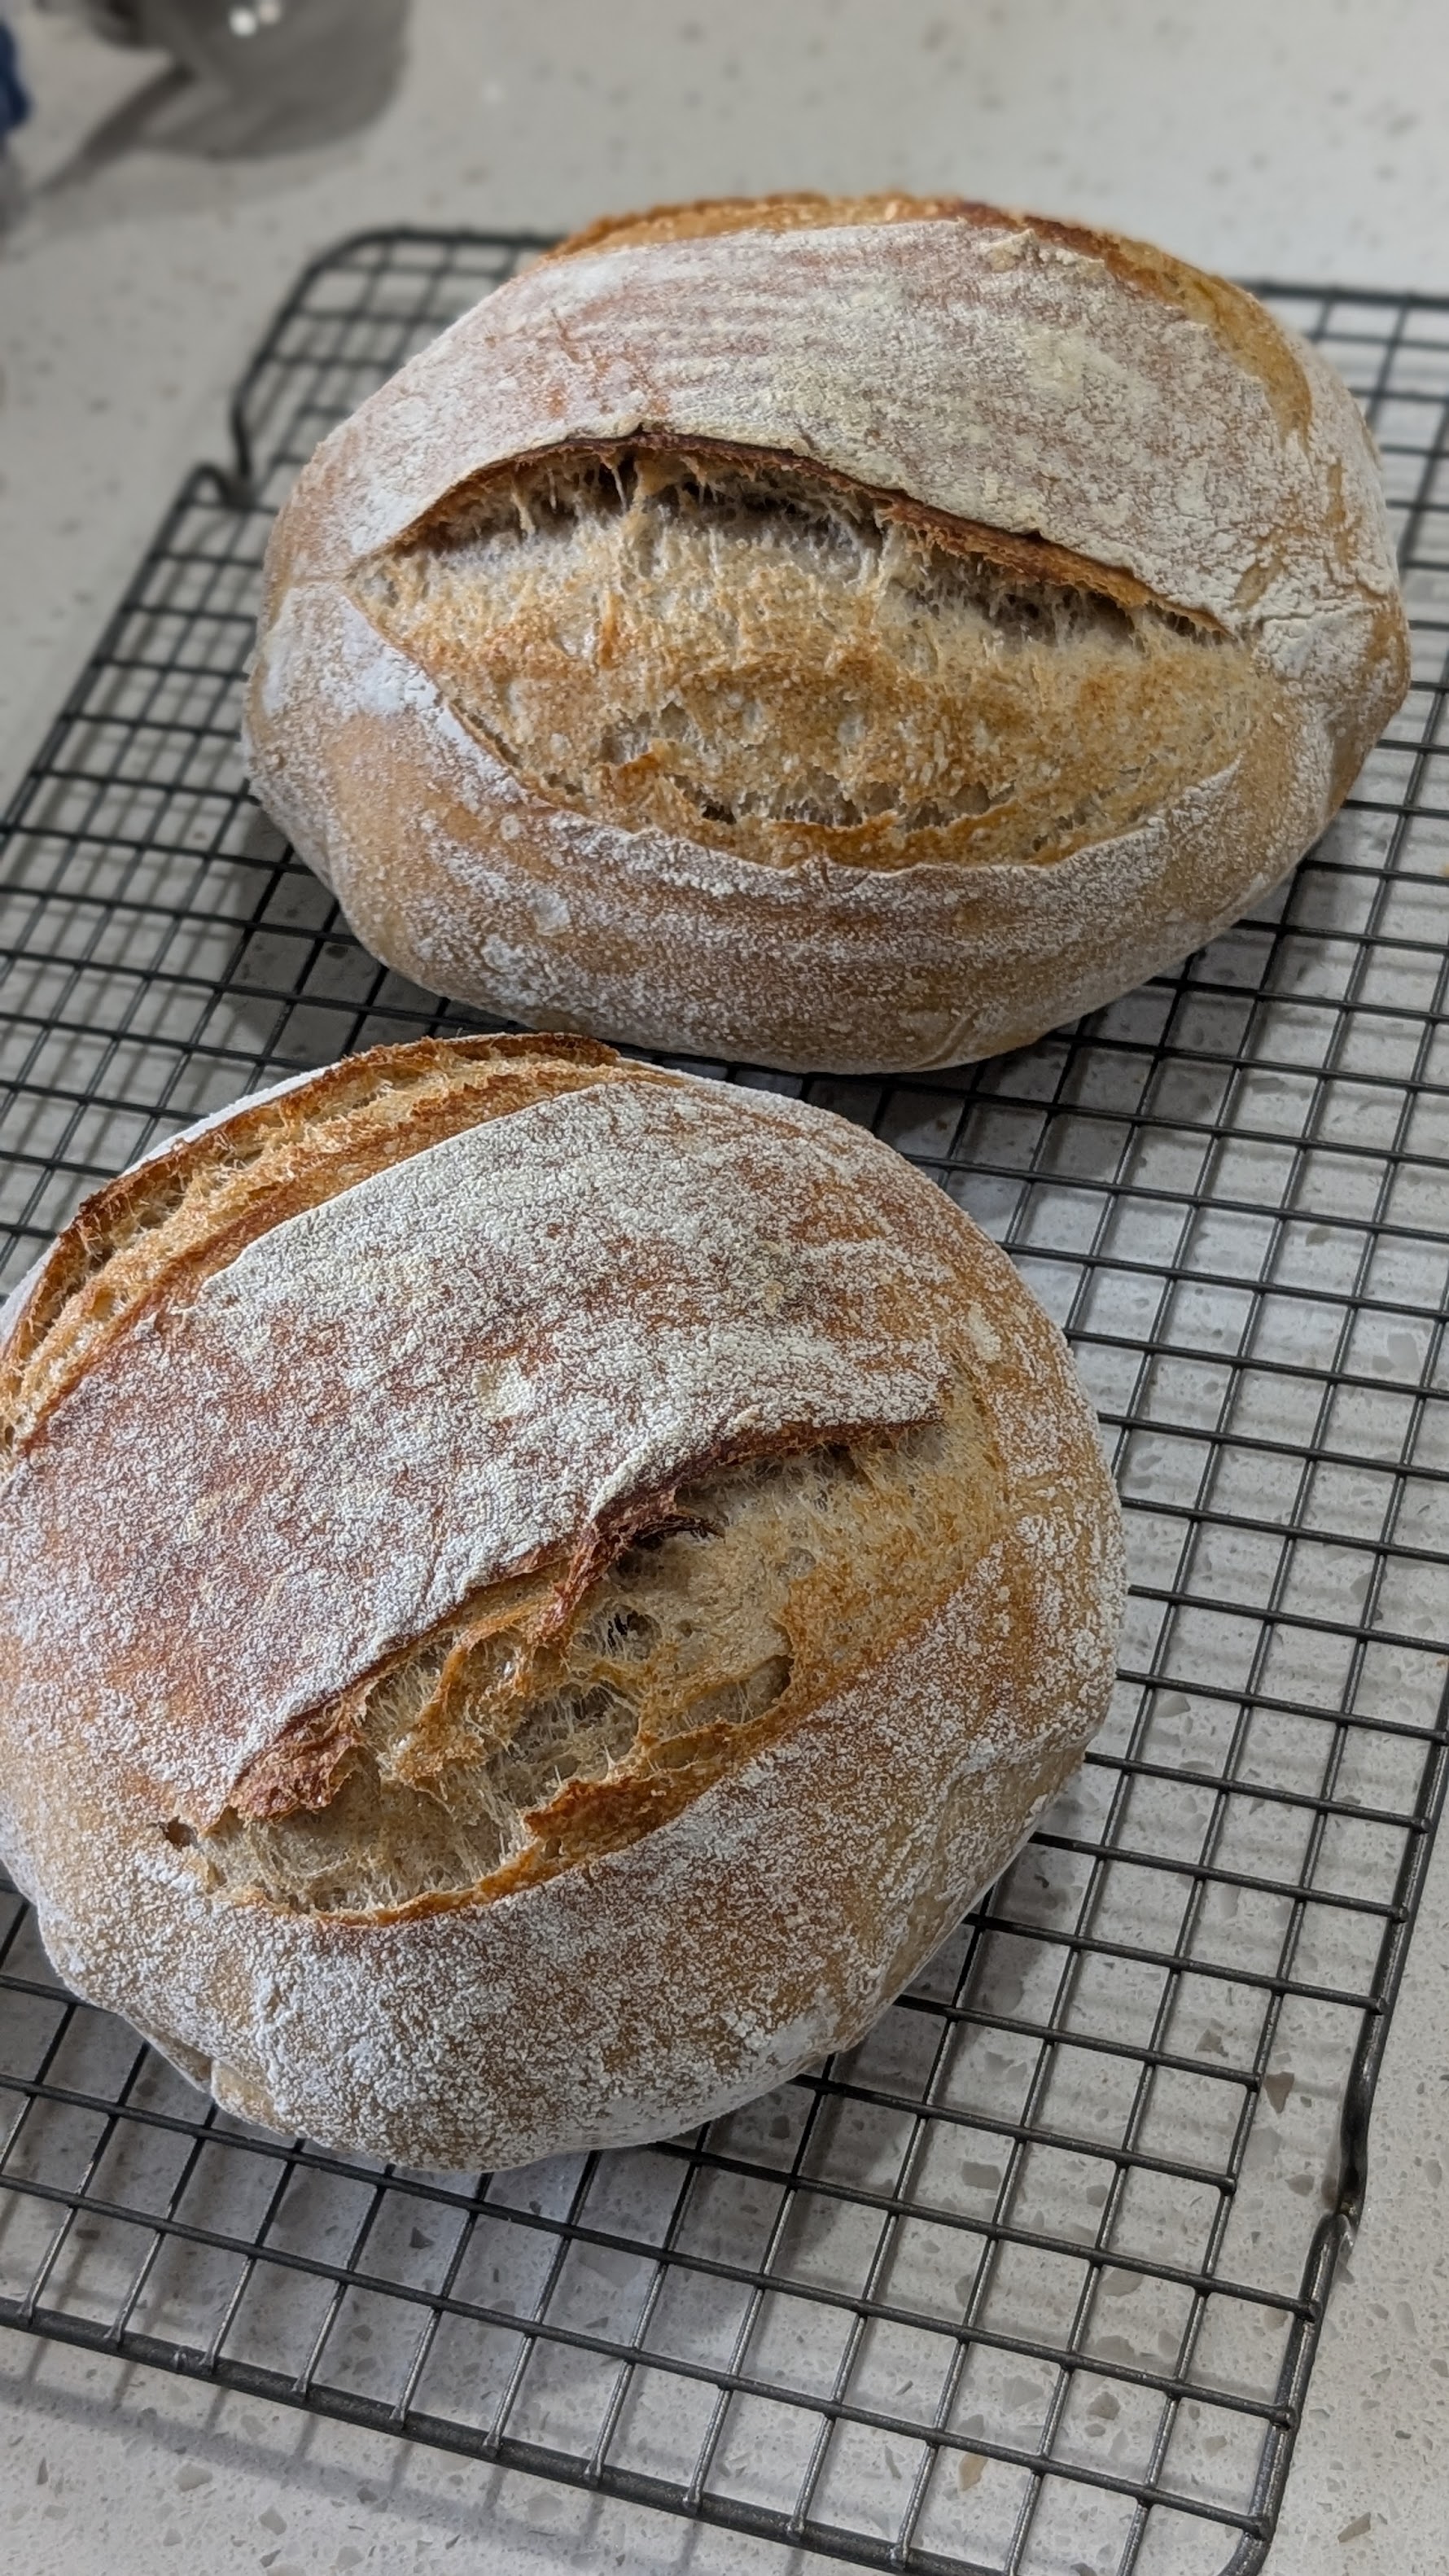
Category: Bread · Sourdough
Recipe: King Arthur — Vermont Sourdough
Rating: 3 / 5 · Make again: Yes · Made by: Aaron
Naturally leavened sourdough with good flavor and a tight crumb that toasts up beautifully — a solid base recipe to build on.
Link Light Rail Model
22 Mar 2026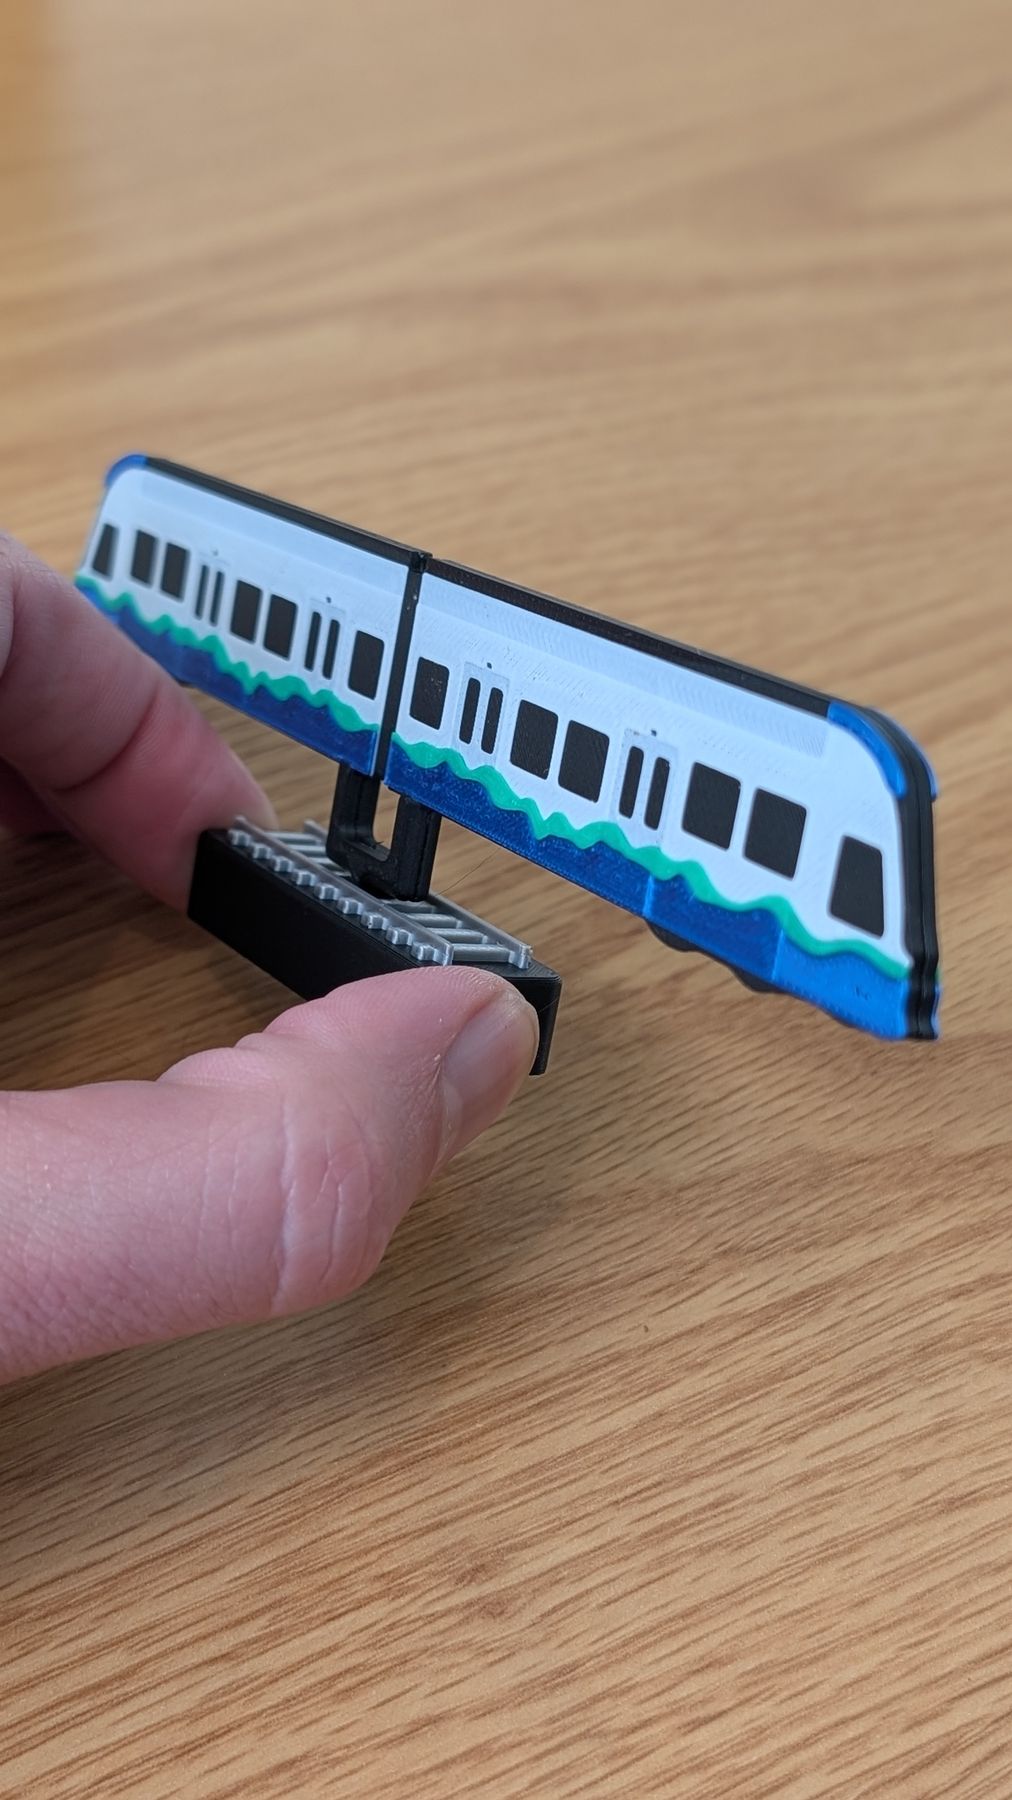
Link Light Rail Model — March 22, 2026
A four-color model of a Sound Transit Link light rail train, created specially to mark the opening of the Crosslake Connection linking Line 1 and Line 2 of the Sound Transit Link system. The model prints as three separate parts — the two sides of the train car are glued together after printing.
Tonga Ridge / Mount Sawyer
30 Sep 2023
Distance: ~6.5 mi · Elevation gain: 1,200 ft · Drive: ~2 hr
Near: Index, WA · Pass: Northwest Forest Pass
WTA
A ridgeline hike above the Skykomish valley with sweeping Cascade views, peak fall color, and an unexpected proposal at the summit.
Vocal Arrangements
04 Jan 2019
Since 2007, I’ve been creating multi-voice arrangements for the a cappella groups that I’ve been involved in. All of these arrangements were created by me (sometimes with the help of friends) for non-commercial purposes. These songs have been sung by Take it SLO in San Luis Obispo, California and Seatown Sound in Seattle, Washington. Please feel free to download, alter, and reproduce my works. If you would be so kind as to credit the original artist and myself that would be just peachy.
Older
Newer